Gluten Free, Vegan-Friendly, One-Bowl Banana Bread!


Guys, this recipe amazing. I found the recipe on Pinterest from the Minimalist Baker and have made a few adaptations to cater it more to my own tastes. Its super easy to make, uses only one bowl and tastes amazing! My parents are usually pretty skeptical of some of the gluten free foods I eat, but they tried this bread and said it was some of the best they’ve ever had–gluten free or otherwise. A promising review!

I love this bread in particular because its delicious, low in added sugars, high in fiber, satisfying and, most importantly, its easy on the stomach. A lot of gluten free products that I try can cause a lot of tummy upset, even though thats what they’re supposed to help prevent! I’ve seriously had zero problems with this bread; zero tummy rumbles, zero upset stomach, zero other gross gastro problems that we won’t get into here.

So what do you need to make this heavenly bread?

banana bread ingredients

  • 4 bananas, very ripe (you want to see brown spots or have entirely brown bananas for this!)
  • 1 tbsp vanilla extract
  • 1 egg
  • 3/4 cup milk, dairy or almond
  • 3+ tbsp coconut oil
  • 1/4 cup brown sugar
  • 1/4 cup cane sugar
  • honey, to taste (use more if your bananas aren’t quite as ripe as you’d like!)
  • 1 tbsp ground cinnamon
  • 1 1/4 cup gluten free flour (I use Glutino’s all-purpose flour and its great–no ashy taste of gritty texture!)
  • 1 1/4 cup oats
  • 1 1/4 cup
  • 3.5 tsp baking powder
  • 1/4 tsp salt

To make this recipe vegan, you can substitute the dairy milk for almond milk and substitute the egg for with a “flax egg” or a “chia egg” by combining one tbsp chia or flaxseed meal with water and allowing to sit for five minutes. Add in where you’d usually add the egg and you should be set!

Directions:

  1. Peel your bananas and mash them with a potato masher or a big spoon. In the meantime, add 3 tbsp of coconut oil to a small pan or bowl and melt. IMG_2164
  2. When thoroughly mashed, add sugars, egg, vanilla, milk, melted coconut oil. Whisk or beat thoroughly to combine. Add honey to suit your tastes–I used about 1 tbsp here. IMG_2137
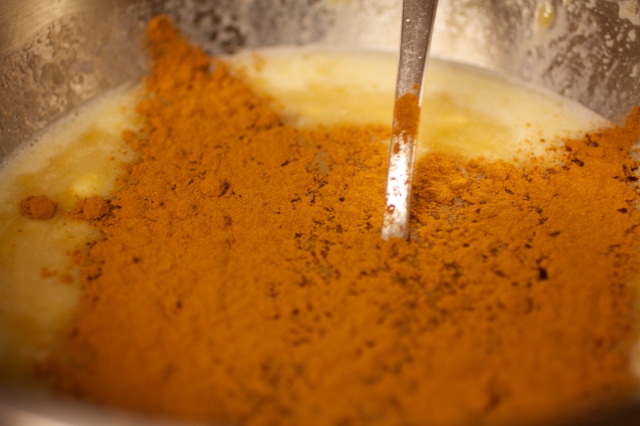
  3. Add in cinnamon and stir to incorporate. IMG_2165
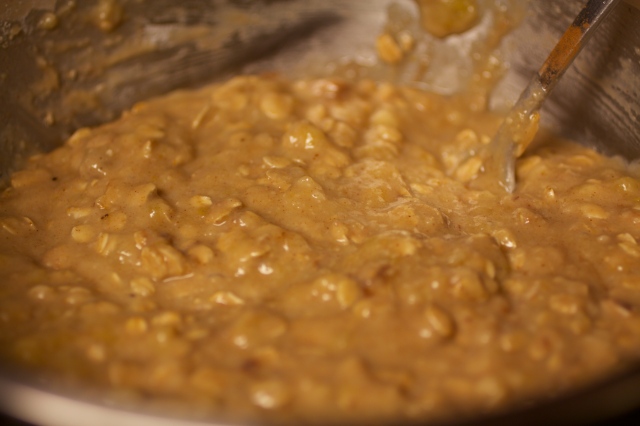
  4. Add in the rest of your dry ingredients–flour, oats, almond meal, baking soda and salt. Stir until well combined. IMG_2167
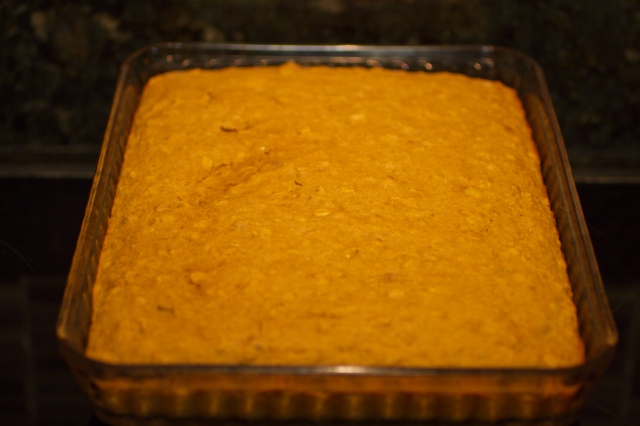
  5. Put into the oven and bake for ~1hr if using a loaf pan. If using a baking pan, cook for 30 minutes and check loaf regularly for done-ness.
  6. Allow to cool slightly (although I prefer this bread when its warm!) and then serve with butter and honey or, if you’re feeling like dessert, Nutella.IMG_2176

And there you have it! This is one of my all-time favorite recipes, and it would be a great thing to bring to a party as an appetizer or dessert. I could seriously eat this bread all day long– its hearty enough for breakfast and its delicate enough for a snack or a dessert. Seriously, once you guys make this you’ll never go back to eating any other kind of banana bread again!

print_to_pdf (1)

Easy Homemade Tzatziki Sauce


IMG_2094

I absolutely adore Tzatziki sauce, guys. Its tangy, fresh-tasting and full of exciting flavors, all packed into a tasty sauce that goes great with veggies, falafel, souvlaki and more! Its also low-calorie, high in flavors and is super simple to make. All you need is a food processor, a large mixing bowl, Greek yogurt (unflavored), cucumber, dill, salt, pepper, lemon and garlic! The preparation only takes a few minutes, although salting the cucumber is what’s going to take up the majority of your prep time! Giving the sauce time to sit to allow the flavors to blend after you’ve prepared it is also never a bad idea, so if you can, prepare the sauce about thirty minutes before you plan on eating it.

Prep time: ~35 minutes with cucumber sweating. Actual prep time ~10 mins. 

Ingredients:

IMG_2063

3 cups Greek Yogurt

2 cloves garlic, large (3 medium or 4 small if you can’t get large).

1 English cucumber, peeled and sliced

1 lemon, juiced with seeds removed

2-4 tbsp dill, to taste (I always add more dil rather than less)

Salt

Pepper

Directions:

  1. Prepare your cucumber by peeling it and cutting it into slices. Place cucumber into a colander in the sink and salt vigorously. Allow to sit for 30 minutes, until cucumbers are thoroughly “sweated.” IMG_2068
  2. In the meantime, set up your food processor, peel your garlic and cut off ends. Chop your dill and juice your lemon.
  3. When cucumbers have been sweated, add to food processor. Combine with dill, lemon juice, garlic and pepper.
  4. Mix until thoroughly combined. I personally prefer to puree all the ingredients; it keeps slimy chunks of cucumber from lingering in your dip. IMG_2072
  5. Pour Greek yogurt into a large bowl. Slowly add cucumber and herb mixture; stir to combine. Season with more salt or pepper to taste.
  6. Allow to sit for about thirty minutes, then serve with veggies or on your favorite Mediterranean dish!

And that’s it! I hope you all enjoy this recipe as much as I do.

-N

print_to_pdf

Chermoula pumpkin with quinoa and yogurt


IMG_7411

This was hands down my favorite dish that we cooked during my class at the Agrarian Kitchen. A perfect mixture of spicy, savory and sweet, the flavors are rich and complement each other well.

Ingredients:

4 cloves garlic, finely chopped

1 tbsp ground cumin

1 tbsp ground coriander

2 tsp chili flakes

2 tsp sweet paprika

1/3 cup finely chopped preserved lemon skin

280 ml extra virgin olive oil, plus extra to drizzle

½ medium sized pumpkin (note: if buying in America, go to an Asian market and look for the squat green-skinned pumpkin, not a standard orange American pumpkin.)

300 gm quinoa

100 gm sultanas (raisins)

40 gm fresh coriander, chopped plus extra to serve

20 gm fresh mint, chopped

60 gm flaked almonds, toasted

4 spring onions, chopped

60 ml (1/2) cup lemon juice.

240 gm Greek yogurt, plain

Directions:

  1. Preheat the oven to 200 degrees Celsius.
  2. In a bowl combine garlic, cumin, coriander, chili, paprika, preserved lemon, two-thirds of the olive oil and 1 tsp salt. This is the chermoula, set aside until required.
  3. Cut the pumpkin into wedges or rounds, leaving the skin intact. Scoop out the seeds and discard.
  4. Spoon the chermoula over each half, spreading it evenly, and place on a baking tray cut side up. Road pumpkin until very soft, about 40 minutes.
  5. Meanwhile, cook the quinoa as described on the box, or in a manner similar to how you would cook rice. I prefer to cook with chicken stock added to the water for better flavor. Once cooked, fluff with fork and set aside.
  6. Soak raisins in 100 ml warm water for 10 minutes, then drain and add to quinoa with remaining oil, herbs, almonds, spring onion, lemon juice and season to taste with sea salt.
  7. Serve pumpkin warm or at room temperature topped with quinoa, spoonfuls of yogurt, scattered with coriander and a drizzle of the extra virgin olive oil.

The Agrarian Kitchen’s Goat Curry


IMG_7403

Goat Curry with Flaky Flat Bread (serves 8-10)

This curry was absolutely amazing, guys. The flavors are so savory and vibrant, but not overwhelming or overly spiced. The actual goat itself might be a little bit difficult to find, but some butchers may have it in your area, and if not you could always substitute it for another type of meat of a similar texture.This recipe is surprisingly simple, and probably won’t be too tough for those cooking along at home! Also, I apologize to my American readers for listing the measurements in metric terms, but thats how they’re written on my recipe and I think its most accurate to copy it verbatim from the sheet. Note: one tablespoon in this recipe (Australian) is slightly smaller than an American tablespoon, at 15 mls instead of 20.

IMG_7393

Ingredients:

9 cloves garlic

2.2 kg goat leg or shoulder, cut into 3 cm pieces.

4 cups plain yogurt

1 tbsp cardamom pods

1 tbsp ground coriander

1 tbsp whole black peppercorns

2 tsp cumin seeds

2 tsp chili powder

1 tsp whole cloves

750 ml (c cups) sunflower oil

7 cm piece ginger, peeled and julienned

6 French shallots, peeled and thinly sliced

thick plain yogurt, to serve

coriander sprigs, to serve

Directions:

1. Place garlic cloves into a blender, add 60 ml water and blend until smooth. Pour garlic into a large, heavy-based pot, add venison, yogurt, spices, 160 ml sunflower oil, ginger, and 2 tsp salt.

2. Place pot over high heat and stir until mixture comes to a boil. Reduce heat to medium and simmer mixture, stirring occasionally to scrape up browned bits from the bottom of the pot, and cook until meat is tender, about two hours.

3. Heat remaining oil in a large saucepan or deep fryer to 170 degrees celsius. Add shallots and deep fry until golden brown, about two minutes. Remove with a slotted spoon and move to an absorbent paper-lined plate and let cool.

4. Place shallots into a mortar and coarsely grind with a pestle. Add shallots and two cups water to venison and cook over medium heat until sauce is reduced and thickened, about 45 mins.

5. To serve, spoon some goat into a bowl or onto a plate and top with a dollop of thick yogurt and coriander sprigs. Serve and enjoy!

IMG_7413


Pink eye potato latkes with bresaola, quail eggs and parsley apple salad from the Agrarian Kitchen!


IMG_7399

Pink eye potato latkes with bresaola, quail eggs and parsley apple salad:

Ingredients (for 8):

2.4 kg potatoes

250 ml (1 cup) clarified butter or ghee

18 slices bresaola

16 quail eggs

2 tbsp white vinegar

1 apple (preferably tart)

2 handfuls parsley leaves, washed and drained

1 tbsp tiny salted capers, rinsed

Ingredients for dressing:

2 cloves garlic

1 tbsp dijon mustard

juice from 1 lemon

3 tsp white wine vinegar

300 ml extra virgin olive oil

Directions:

1. Peel potatoes and coarsely grate into a large bowl. Have another clean tea towel ready. Working quickly, take a  handful of potato and firmly squeeze to extract as much liquid as possible, then transfer into the second bowl. Repeat until all potato is dry, then season with salt and pepper, mixing well.

2. Heat 2 tbsp butter in small frying pan, add enough potato to cover bottom by about 1-2 cm and cook for 6-7 minutes each side over low-medium heat until crisp and golden brown. Transfer to a baking tray and keep warm in an oven. Repeat with remaining butter and potato.

3. Bring a saucepan of water to boil over high heat, add quail eggs and cook for one minute, then remove and immediately refresh in iced water, add vinegar and set aside for 1-2 minutes. Peel and set aside.

4. For vinaigrette, place garlic cloves in a mortar and using a pestle, finely crush. Add mustard, lemon juice and vinegar and whisk to combine, then whisk in olive oil.

5. To serve place a latke on each plate, top with cured meat and halved eggs. Toss together parsley, apple and capers with a little of the vinaigrette. Serve immediately.

IMG_7398

Recipes from my cooking class at the Agrarian Kitchen in Lachlan, Tasmania!


Hey all!
I recently wrote a post for my travel blog about my experience cooking at the Agrarian Kitchen in Tasmania, and after my class I was allowed to keep my recipe book! So I thought it would be fun to combine my interest in travel and my interest in cooking by posting my recipes from the experience here, with a few photos that I took while doing the class. Unfortunately not all the recipes are going to have photos, but I’ll do my best to post as many as I can! I’m going to be posting one recipe at a time, but here’s a preview of the menu so that you all can see what I’ll be posting!

IMG_7380


Eggplant Mozzarella Bake!


Alright, guys. This dish is delicious. And healthy and gluten free. Those are the only three positives about this dish.

IMG_4232

Although it totally messes with my new minimalist cooking style (one pot, one pan, one plate) and used just about every dish that I own and then some, I’m going to post it anyway because 1) its super tasty, 2) its healthy and satisfying and 3) its still gluten free. So if you have a lot of time to kill and a dishwasher, I’d recommend giving it a shot!

Eggplant Mozzarella Bake

(like eggplant lasagna only without the gross ricotta)

Suggested Ingredients:

  • 2 medium eggplants
  • 1 onion
  • 3 cloves garlic
  • 1 can of crushed tomatoes, 28 oz (or more! I’m a bad sauce budgeter so I struggled a bit with this amount.)
  • 1 container fresh mozzarella, large balls (there should be four or so in the container).
  • salt and pepper

IMG_4206

Optional:

  • fresh basil
  • parmesan cheese

Instructions: 

  1. Preheat oven to 400 degrees.
  2. Prepare your onions, garlic and basil. Chop the onions thoroughly, mince the garlic and sliver the basil. Cut mozzarella balls into thin slices. IMG_4210
  3. Over medium heat, add 1 tbsp oil to a pan. Note: it might be useful for you to do this in a pot if you don’t have more than one large frying pan. Add onions and cook for five minutes. IMG_4213
  4. Add garlic and continue to cook for two minutes.
  5. Pour in the entire can of tomatoes and stir. Add salt, pepper and basil. Continue to cook for 20 minutes.IMG_4215
  6. While sauce is cooking, heat a large frying pan or griddle until smoking hot.
  7. Slice your eggplant lengthwise (as pictured). The original recipe I used suggested coating the eggplant in oil and salting and peppering it, and I used a brush in order to do so. This is extremely messy and inconvenient. HOWEVER, my recommendation would be to take a baking pan and pour oil into that, then dip the eggplant in the pan on both sides. Salt and pepper while its sitting in the pan and then move immediately into the griddle. Don’t worry about the seeds–you won’t even notice them!IMG_4218
  8. Cook eggplant until it becomes somewhat squishy and browned on bottom side. Flip and repeat. IMG_4220
  9. Remove sauce from heat and pour several ladelfuls on the bottom of a bakesafe pan. As eggplant cooks, layer eggplant along the bottom, side by side. IMG_4223
  10. Place mozzarella on top of the eggplant, then pour another layer of sauce to cover. Repeat until you run out of ingredients. IMG_4224
  11. Sprinkle parmesan cheese over the topmost layer of sauce and put into the oven. Bake until the cheese on top (and probably some mozzarella seeping through) browns slightly. Enjoy! IMG_4226

Same idea, new direction!


Lovely people of the internet!

I know it’s been a while since I’ve posted anything, and I promise I have good reasons for that! Coming home from my year of studying abroad was incredibly difficult, and coming back to sub-par housing and a completely inefficient/terrible kitchen made cooking anything of value difficult. In addition, I’ve recently learned, through trial and error, that I’m moderately gluten intolerant, which has made it difficult for me to make a lot of the foods I’m better at cooking and, for the time being, has made baking a non-thing. I don’t know if any of you have tried gluten-free baking, but its basically the worst and most difficult science project ever. And, seeing as I’ve never been very good at complex scientific endeavors, I’ve found that learning how to do GF baking is basically impossible, and at the very least more hassle than it’s worth for the time being. I was just starting to get the hand of normal baking!

Trying to do GF baking has left me with a lot of questions.  What is Xanthan Gum and why is it so expensive? Why does my pumpkin bread taste like I’m licking a festive, autumnal-flavored ashtray? How much money am I going to have to spend before I actually create something edible? And for the time being, I’m going to go ahead and let those questions just sit unanswered because I live near a co-op that bakes/imports tons of tasty GF baked goods for me so that I don’t have to put myself through the torture of doing it myself.

Unfortunately, eating and gluten free is a task in its own right, and I’m only just starting to get the hang of it. Of course there are some awesome GF substitutes for “normal” foods, but they tend to be expensive and often aren’t especially good for you. So I’ve been experimenting with some recipes at school, trying to find out what works and what doesn’t. Lately I’ve been in a bit of a rut and have been eating a lot of soups and snacks and basically eating my entire weight in clementines on a weekly basis. But I know that I’m going to be facing a much more difficult/awesome problem soon: as some of you may  have read on my travel blog, I have a trip booked for this summer to Australia, New Zealand, Indonesia, Cambodia, Vietnam and possibly Lao. Although I’m pretty sure I’ll be able to manage fairly well in Southeast Asia, where few foods contain gluten anyway (except pesky soy sauce!), I’m actually more worried about eating GF on the cheap in Australia and New Zealand.

Which brings me back to my main point– a new(ish) direction for the blog! I will be trying out some recipes that will translate well to cooking in hostels and use my blog to compile a list. I’m going to say in advance that the recipes might be a step down from the recipes I’ve posted to date; the whole goal is to make them manageable in situations in which I might only have one pot and one frying pan and one bowl, not to mention on a time crunch. Simple, cheap, healthy, wholesome gluten-free meals that can be made on the fly and don’t involve a lot of obscure, single-use ingredients.

So there you go! As time goes on I may try and modify some old recipes to make them GF, but as mentioned above with my pumpkin bread endeavor, this may be more difficult than I initially thought it would be. Hopefully I’ll be getting something up for you guys soon!

-Natalie

Grilled Eggplant & Goat Cheese from Mykonos, Greece


After spending some much needed fun time in my favorite city of Budapest, where I ate almost no Hungarian other than sausages and the occasional Goulash, I’m happy to say that I’m back to eating some regional cuisines. And what better place to start than in Greece? This was my light lunch for the day:

Location: Mykonos, Greece

Food: Grilled eggplant with baked goat cheese, tomato sauce and pita.

OLYMPUS DIGITAL CAMERA

Thoughts: Simple but extremely rich, I couldn’t even finish the whole thing! It was very tasty but also a bit sharp. Could have done with a little more tomato sauce though. Perfect summer dish!

Baklava from Istanbul, Turkey


When I was in Turkey, I tried a lot of baklava. Like, a lot a lot. The first one I ordered, however, was by far the best, and came with a deliciously refreshing serving of creamy ice cream as well. And although it didn’t come from any small stand or niche bakery or shop, I thought it was absolutely mindblowing. In fact, I went back to the same restaurant and ordered it again, despite it being a little bit pricey.

Location: Palatium Restaurant, Istanbul, Turkey

Food: Baklava and Vanilla Ice Cream

Thoughts: Absolutely delicious! Seeping with flavorful honey under layers of fresh, flaky pastry, with some cool, creamy ice cream for balance. A must-order item if you ever find yourself at this awesome little cafe. Bonus/plug: the staff are wonderful, efficient and not pushy, and if you happen to be suffering from a painful migraine and need to lie down and order an excessive amount of tea, they’ll only mock you a little bit before bringing you a blanket and pillow and letting you take a cat nap.

IMG_1003